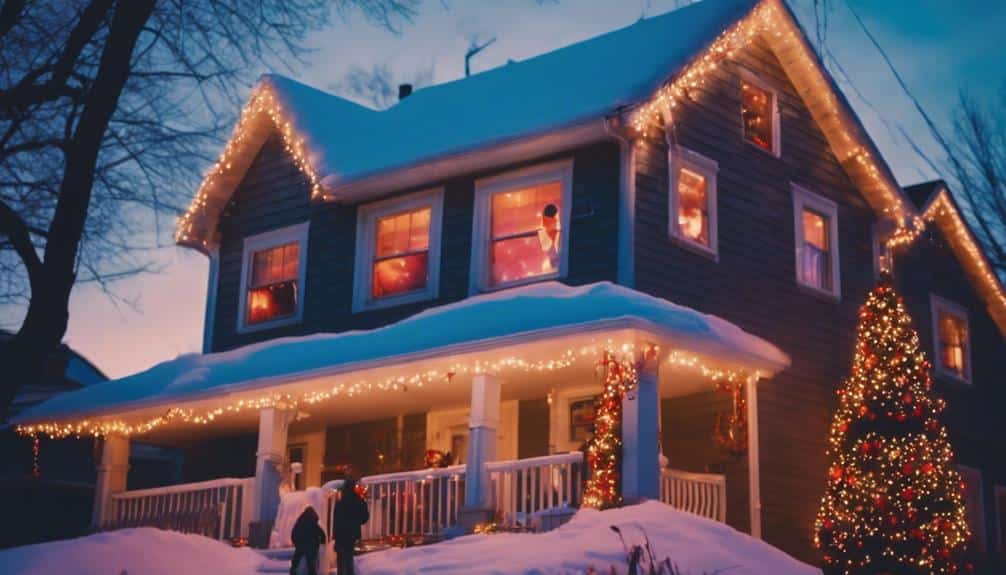
Seasonal Considerations: Planning Your Christmas Light Installation Timeline
When planning your Christmas light installation timeline, consider key seasonal factors. Start by checking weather forecasts, aiming for temperatures above freezing and calm conditions. Schedule installation for late October or early November, during peak daylight hours (9 AM to 3 PM). Order supplies early to avoid inventory shortages and allow time for backorders. Familiarize yourself with local regulations and submit permit applications 4-6 weeks in advance. Book professional installers well ahead of time if needed. Plan for ideal working conditions between 50°F and 70°F to ensure safety and efficiency. By addressing these considerations, you’ll set the stage for a dazzling holiday display.
Weather Forecasting and Installation
Always check the weather forecast before scheduling your Christmas light installation to secure ideal conditions for a safe and efficient setup. Aim for a day with temperatures above freezing, low wind speeds, and no precipitation. Ideal conditions typically occur in late October or early November, depending on your location.
Consider the long-term forecast as well. You’ll want to avoid installing lights just before a major storm or cold snap, which could damage your newly hung decorations. If you’re in an area prone to early snowfall, plan to install your lights before the first predicted snowfall of the season.
When selecting your installation day, factor in daylight hours. Start early to maximize available light, especially if you’re tackling a large project. If you’re using a ladder, make sure the ground isn’t wet or icy to prevent slips.
Remember that some materials, like plastic clips and zip ties, can become brittle in very cold temperatures. If you must install in colder weather, handle these items with care and consider using more durable metal fasteners.
Optimal Temperature for Outdoor Work
While weather forecasting helps you plan, understanding the best temperature range for outdoor work guarantees you’ll be comfortable and efficient during your Christmas light installation. The ideal temperature for outdoor work typically falls between 50°F and 70°F (10°C to 21°C). Within this range, you’ll avoid the discomfort of extreme cold or heat, allowing you to focus on the task at hand.
When temperatures dip below 50°F, your dexterity may decrease, making it harder to handle small clips and wires. Cold fingers can also slow down your work pace. On the other hand, temperatures above 70°F can lead to overheating and fatigue, especially when you’re climbing ladders or working in direct sunlight.
If you must work outside this ideal range, take precautions. In colder weather, wear layered clothing and insulated gloves with finger dexterity. For warmer temperatures, choose light, breathable fabrics and stay hydrated. Remember to take frequent breaks in either extreme.
Daylight Hours and Visibility
Daylight hours play a crucial role in your Christmas light installation timeline, affecting both safety and efficiency. As winter approaches, you’ll notice the days getting shorter, which can greatly impact your installation process. To make the most of available light, plan your work during peak daylight hours, typically between 9 AM and 3 PM.
Begin by evaluating your property’s lighting needs and create a detailed plan before you start. This preparation will help you work more effectively during limited daylight. Prioritize tasks that require the most visibility, such as roof work or intricate designs, for the brightest part of the day. Leave simpler tasks, like ground-level installations, for later hours when natural light begins to fade.
Consider using portable work lights to extend your working time and guarantee safety in low-light conditions. However, be mindful that artificial lighting may not accurately represent how your display will look at night.
To address this, periodically test your lights as you install them, even if it means briefly switching them on during the day. This approach will help you identify any issues or adjustments needed while you still have sufficient daylight to make corrections.
Supply Chain and Inventory Challenges
To prevent supply chain disruptions, you’ll want to order your Christmas lights and decorations early, ideally by late summer or early fall.
Keep a list of alternative suppliers as a backup plan in case your primary source faces inventory issues.
Remember that popular items, especially new or trendy decorations, tend to sell out quickly, so prioritize purchasing these first to guarantee you have everything you need for your holiday display.
Early Ordering Prevents Shortages
Three key factors make early ordering of Christmas lights crucial: supply chain disruptions, heightened demand, and potential inventory shortages. By planning ahead and placing your orders well in advance, you’re safeguarding your holiday decorating plans against these challenges.
Early ordering offers several advantages:
- Ensures product availability: You’ll have access to a wider selection of lights and accessories before popular items sell out.
- Allows time for backorders: If certain products are temporarily out of stock, you’ll have ample time for them to be restocked.
- Provides flexibility for customization: With early ordering, you can request custom light configurations or specialty items that may take longer to produce.
To implement an early ordering strategy, start researching and selecting your Christmas light products in late summer or early fall. Create a thorough list of the lights and accessories you’ll need, including quantities and any specific features or colors.
Don’t forget to account for potential breakages or malfunctions by ordering a few extra strands. By taking these proactive steps, you’ll be well-prepared for a smooth and stress-free holiday lighting installation, avoiding the last-minute rush and potential disappointment of product unavailability.
Alternative Suppliers Backup Plan
Creating a backup plan with alternative suppliers is vital for managing potential supply chain disruptions and inventory shortages during the holiday season. You’ll want to identify and establish relationships with multiple suppliers who can provide the Christmas lights and accessories you need.
Research local, national, and international suppliers to diversify your options.
When vetting alternative suppliers, consider factors such as product quality, pricing, minimum order quantities, and shipping times. Request samples to guarantee their products meet your standards. Negotiate terms and pricing in advance, so you’re prepared to place orders quickly if your primary supplier falls through.
Keep a list of these backup suppliers, including their contact information and product offerings. Regularly update this list and maintain communication with these suppliers throughout the year. This ongoing relationship can prove invaluable when you need to make last-minute purchases.
Consider joining industry associations or online forums where you can connect with other professionals in the Christmas light installation business. These networks can provide recommendations for reliable suppliers and alert you to potential shortages or supply chain issues.
Popular Items Sell Fast
Many popular Christmas light items can sell out quickly, presenting significant supply chain and inventory challenges for installation businesses. To ensure you’re not caught off guard, it’s essential to stay ahead of the game.
Start monitoring inventory levels of your most sought-after products as early as late summer. Keep a close eye on trending items and new releases that might become the season’s must-haves.
Consider these strategies to mitigate supply chain risks:
- Pre-order high-demand items in bulk from reliable suppliers
- Diversify your product range to include alternatives for popular lights
- Establish relationships with multiple vendors to guarantee consistent supply
Don’t underestimate the power of data analysis. Track your sales history from previous years to identify patterns and predict which items are likely to fly off the shelves. This information will help you make informed decisions about stock levels and reordering timelines.
Local Regulations and Permit Timing
Before hanging your Christmas lights, you’ll need to familiarize yourself with local regulations. Check your municipal bylaws to understand any restrictions on outdoor lighting displays and determine if you need to apply for permits.
Don’t forget to review your homeowners’ association (HOA) guidelines and approval processes, as these can impact your installation timeline and design choices.
Check Municipal Bylaws
To confirm compliance with local regulations, you’ll need to check your municipality’s bylaws regarding outdoor holiday decorations and lighting displays. These rules can vary significantly from one area to another, so don’t assume that what’s allowed in a neighboring town applies to your property.
Contact your local city hall or visit their website to access the most up-to-date information on holiday lighting regulations.
When reviewing your municipal bylaws, pay close attention to:
- Timing restrictions: Some areas have specific dates when you can install and must remove holiday lights
- Brightness and light direction: Regulations may limit the intensity of lights or prohibit them from shining directly into neighboring properties
- Electrical safety standards: Verify your installation meets local electrical codes and safety requirements
Be aware that certain neighborhoods, especially those with homeowners’ associations, may have additional rules beyond municipal bylaws. If you’re planning an elaborate display, you might need to apply for a special permit.
Don’t wait until the last minute to check these regulations, as permit applications can take time to process. By understanding and adhering to local bylaws, you’ll avoid potential fines and guarantee your festive display brings joy to your community without causing any legal issues.
Permit Application Deadlines
If you’re planning an elaborate Christmas light display that requires a permit, you’ll need to familiarize yourself with local application deadlines to guarantee timely approval. Most municipalities have specific timeframes for processing permit applications, which can vary significantly depending on your location and the complexity of your display.
Typically, you should submit your permit application at least 4-6 weeks before your planned installation date. Some cities may require even longer lead times, especially during the busy holiday season. It’s vital to check with your local building or zoning department for exact deadlines.
Remember, larger or more complex displays might necessitate additional review time.
Don’t forget to factor in potential delays. Incomplete applications, missing documentation, or the need for revisions can extend the approval process. To avoid setbacks, gather all required information and documents well in advance. This may include detailed plans of your display, electrical specifications, and proof of insurance.
If you’re unsure about the permit requirements or application process, don’t hesitate to contact your local authorities. They can provide guidance and make sure you’re on track for a timely and compliant installation.
HOA Approval Processes
Homeowners’ Associations (HOAs) often have their own set of rules and approval processes for Christmas light displays, which you’ll need to navigate alongside local regulations and permit requirements. Start by reviewing your HOA’s bylaws or contacting your association’s board to understand their specific guidelines. Many HOAs have restrictions on:
- The duration of holiday displays • The types of decorations allowed • The hours when lights can be illuminated
Typically, you’ll need to submit a formal request to your HOA board, detailing your planned display. This may include a sketch of your design, a list of materials, and the proposed installation and removal dates. Be prepared for a review process that can take several weeks, so it’s important to start early.
Some HOAs may require you to obtain written approval from your immediate neighbors before granting permission. Others might have a committee dedicated to reviewing holiday decorations. If your HOA denies your request, don’t be discouraged. You can often negotiate or modify your plans to reach a compromise.
Energy Costs and Usage Planning
In light of rising electricity costs, planning your Christmas light display’s energy usage is essential for managing your holiday budget effectively. Start by estimating your display’s total wattage by adding up the wattage of all your lights and decorations. Then, calculate your expected energy consumption by multiplying this total by the number of hours you’ll run your display each day.
To reduce energy costs, consider switching to LED lights, which use up to 90% less energy than traditional incandescent bulbs. Install timers to automate your display’s operation, ensuring it’s only on during peak viewing hours. You can also stagger your lighting, illuminating different sections at various times to maintain visual interest while conserving energy.
Research your local electricity rates and consider adjusting your display schedule to take advantage of off-peak hours when rates are lower. Some utility companies offer holiday light calculators on their websites, helping you estimate costs more accurately.
Don’t forget to factor in potential increases in your electricity bill when budgeting for your holiday expenses. By planning ahead and implementing energy-saving strategies, you’ll create a festive display without breaking the bank.
Professional Installation Scheduling Considerations
While managing energy costs is important, you’ll also need to take into account the timing of professional installation if you’re opting for expert help with your holiday light display.
Professional installers often have packed schedules during the holiday season, so it’s vital to book their services well in advance. Aim to schedule your installation for late October or early November to make sure you’re not left in the dark.
When considering professional installation, keep these key points in mind:
- Availability: Popular installers may be booked months in advance, so start your search early.
- Weather considerations: Installation becomes more challenging in cold or wet conditions, so earlier dates are often preferable.
- Customization time: If you’re planning a complex or custom display, allow extra time for design and preparation.
Remember that many professional installers offer package deals that include both installation and removal services. This can save you time and effort post-holiday season.
Additionally, discuss any specific requirements or preferences you have with your installer beforehand. This ensures they can accommodate your vision and helps avoid any last-minute surprises or disappointments when the lights go up.
Post-Holiday Removal and Storage Preparation
As the holiday season winds down, planning for the timely removal and proper storage of your Christmas lights is crucial to ensure their longevity and ease of use next year. Start by choosing a date for removal, typically within the first two weeks of January. Before taking down the lights, test each strand to identify any faulty bulbs or sections that need replacement.
When removing lights, work carefully to avoid tangling or damaging the wires. Gently detach them from clips, hooks, or other fasteners, and coil each strand loosely. For efficient storage, consider using light reels, cord wraps, or sturdy cardboard squares to keep strands organized and tangle-free.
Clean your lights with a soft, dry cloth to remove dust and debris. If they’re weathered, use a damp cloth with mild soap, ensuring they’re completely dry before storage. Label each strand with its length, color, and location used to streamline next year’s installation process.
Store your lights in a cool, dry place away from direct sunlight and extreme temperatures. Use airtight plastic bins to protect them from moisture and pests. By following these steps, you’ll preserve your Christmas lights and simplify next season’s decorating process.
Frequently Asked Questions
How Do I Choose the Right Color Scheme for My Christmas Lights?
To select the right color scheme for your Christmas lights, start by considering your home’s exterior and personal preferences. Opt for classic white lights for a timeless look, or go bold with multicolored strands for a festive feel.
You can also choose colors that complement your home’s paint or trim. Consider creating a theme, like a winter wonderland with blue and white lights. Don’t forget to factor in your neighborhood’s overall aesthetic to guarantee your display fits in harmoniously.
Can I Use Indoor Christmas Lights for Outdoor Decorations?
You shouldn’t use indoor Christmas lights for outdoor decorations. Indoor lights aren’t designed to withstand moisture, temperature changes, or UV exposure. They lack the necessary insulation and weatherproofing, which can lead to safety hazards and electrical shorts.
Instead, invest in outdoor-rated lights specifically made for exterior use. These are more durable, have thicker insulation, and often come with features like sealed connections.
Always check the packaging to make sure you’re using the right type of lights for your outdoor display.
How Many Lights Do I Need for My House Size?
To determine how many lights you need for your house, consider its size and the desired effect. A general rule of thumb is 100 lights per foot of roof line or house perimeter.
For a typical 1,500 sq ft home, you’ll need about 1,000 to 1,500 lights. Don’t forget to account for windows, doors, and other architectural features.
It’s always better to have a few extra strands on hand for adjustments or unexpected areas you’d like to highlight.
What’s the Difference Between LED and Incandescent Christmas Lights?
Picture yourself riding a penny-farthing bicycle past two houses: one gleaming with LED lights, the other warmly glowing with incandescents. You’ll notice key differences between these Christmas light types.
LED lights are energy-efficient, long-lasting, and cooler to the touch. They’re available in various colors and often more durable.
Incandescent lights, while less efficient, offer a traditional warm glow and are typically cheaper upfront. They’re also easier to replace individually.
Your choice depends on your priorities: energy savings or classic ambiance.
How Can I Prevent Tangled Christmas Lights During Storage?
To prevent tangled Christmas lights during storage, you’ll want to adopt a systematic approach. Start by carefully wrapping your lights around a sturdy cardboard tube or plastic reel. Secure the ends with twist ties or clips.
Alternatively, use storage reels specifically designed for Christmas lights. Always remove batteries from battery-operated lights before storing.
Store each set separately in labeled, airtight containers to protect them from moisture and dust. Finally, keep your lights in a cool, dry place to maintain their longevity.
Conclusion
You’ve planned perfectly for your Christmas light scenery, considering weather, warmth, and workable hours.
Don’t delay in deciding on designs and dealing with supply demands.
Remember regulations, reserve resources, and recognize rising energy expenses.
If pursuing professional placement, promptly pick providers.
Prepare for post-holiday processes too.
With watchful waiting and wise choices, you’ll create a captivating Christmas display that dazzles and delights, while dodging potential difficulties.
Your luminous landscape will leave lasting memories for all who see it.